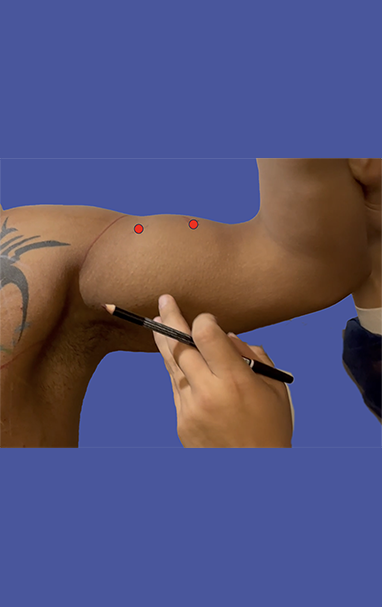
Anterior View . Marking
Posterior View:Marking

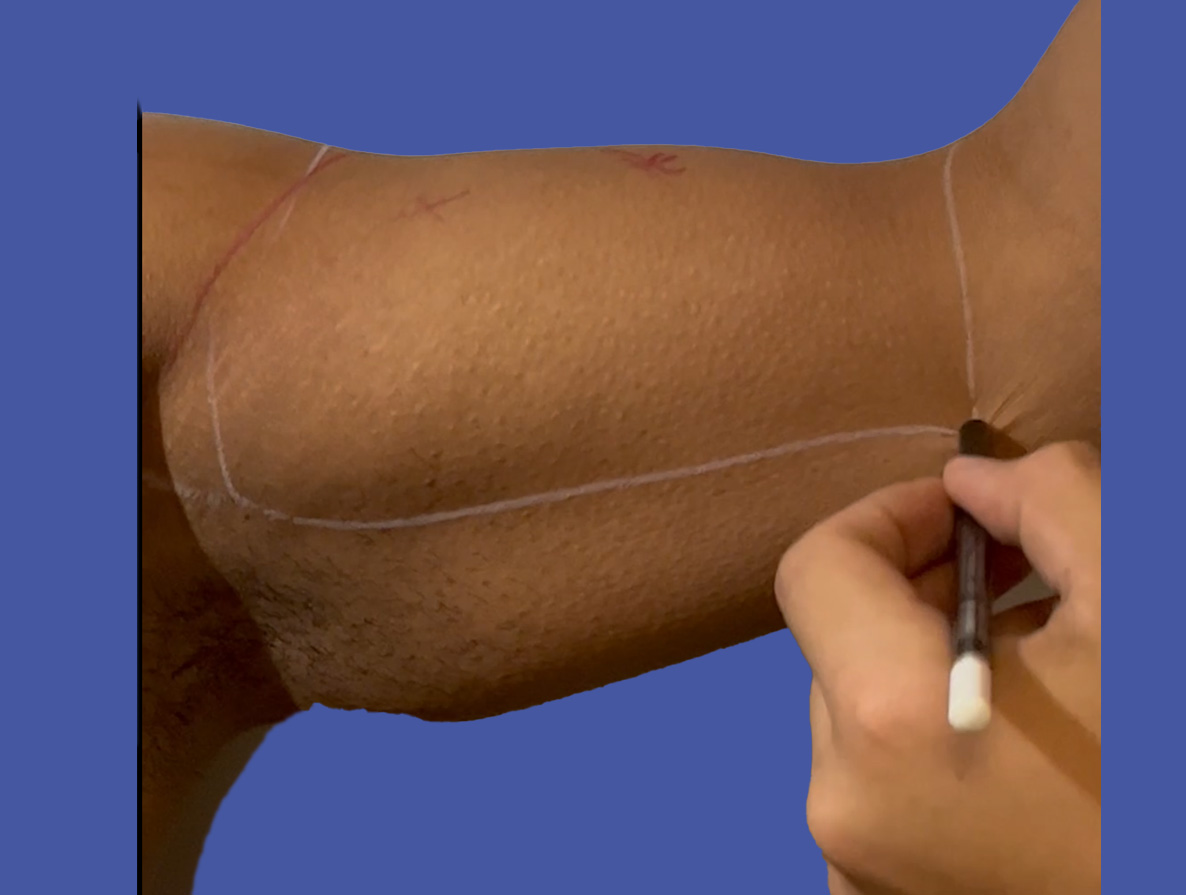
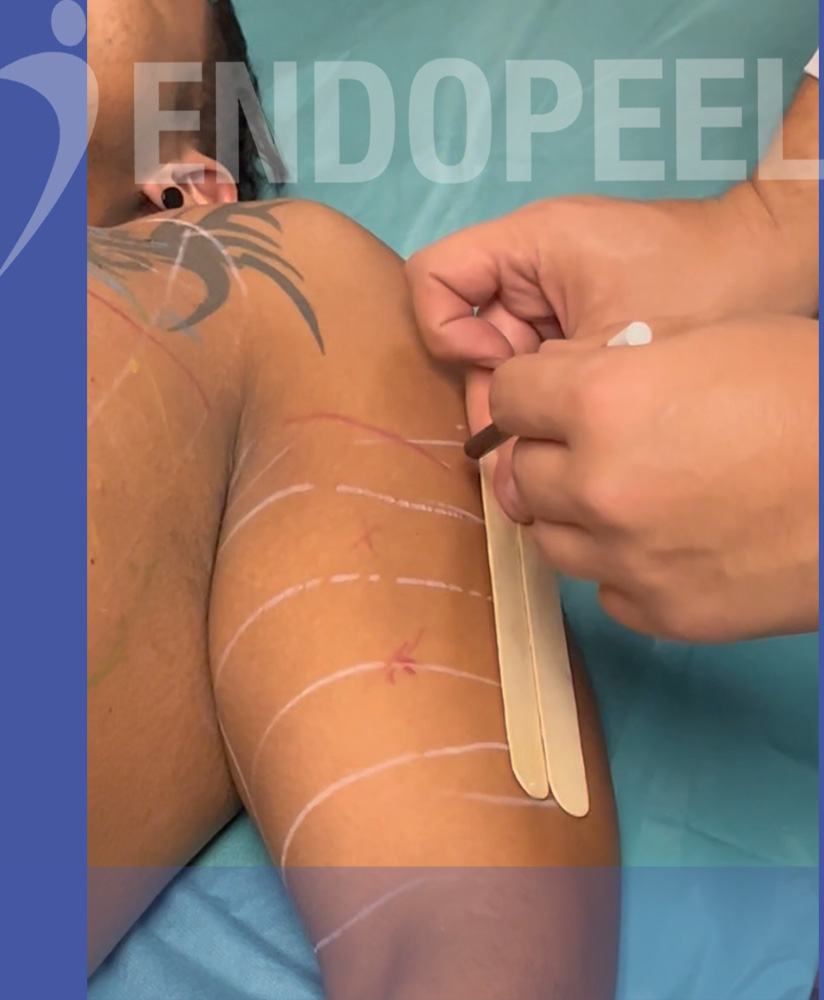
Step 1 :Marking the limits of the working area
- The biceps brachii muscle is a two-headed muscle located in the upper arm, and it plays a crucial role in elbow flexion and forearm supination.
- If you are considering biceps projection, it's important to note that the anatomy of the biceps area is limited by the natural boundaries of the muscle.
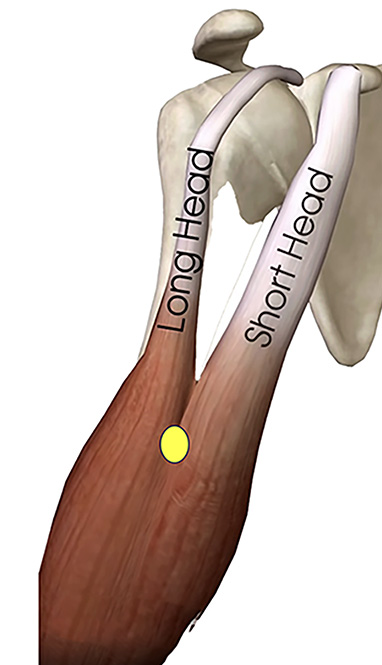
The 2 heads of biceps brachii

I
1 st point of maximum projection
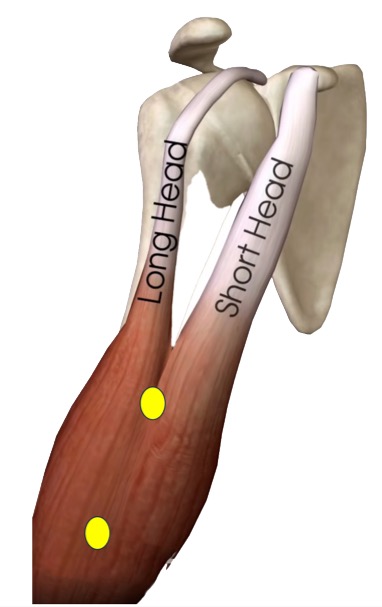
2 nd point of maximum projection
I
anterior view: 2 points of maximum projection
I
why 2 points of maximum projection

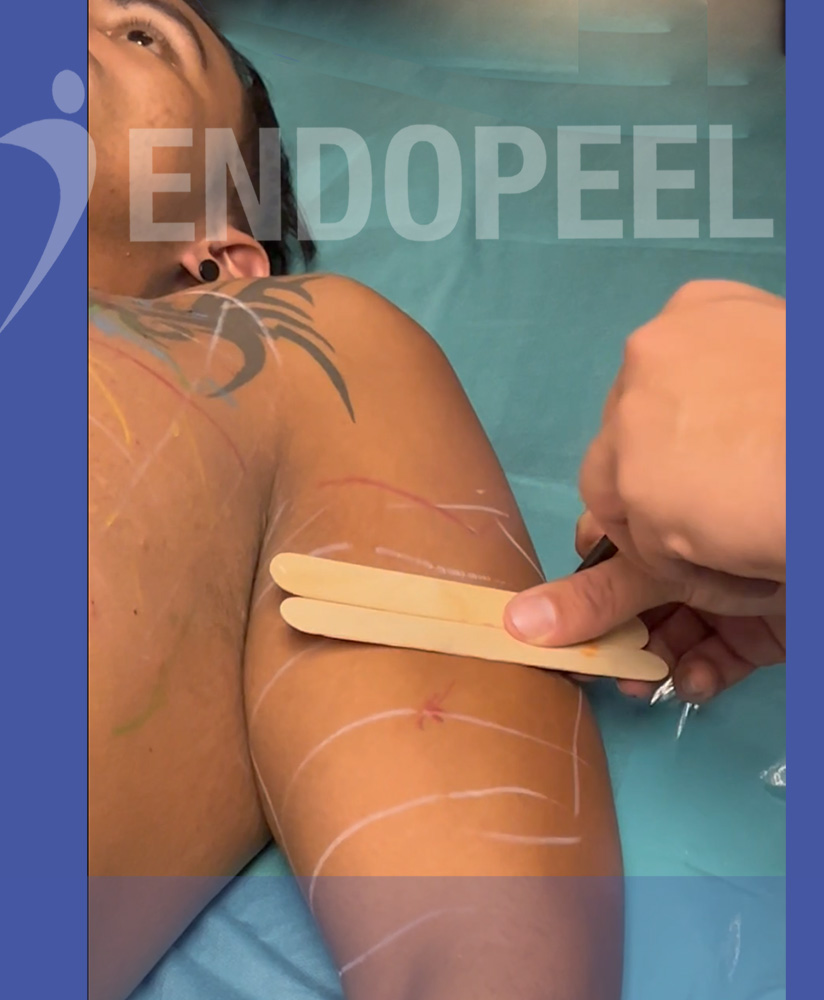
Step 3 : Division of the biceps working area into squares
-
Divide the biceps working area into squares with horizontals starting from the elbow towards the shoulder .
-
The distances between 2 lines equal to 2 times the width of the standard tongue depressors
Step 4 : Division of the biceps working area into squares
-
Divide the biceps working area into squares with verticals starting inward going out.
-
The distances between 2 lines equal to 2 times the width of the standard tongue depressors

Step 5 : Division of the biceps working area into squares is ready
The distances between 2 raws as 2 columns equal to 2 times the width of the standard tongue depressors
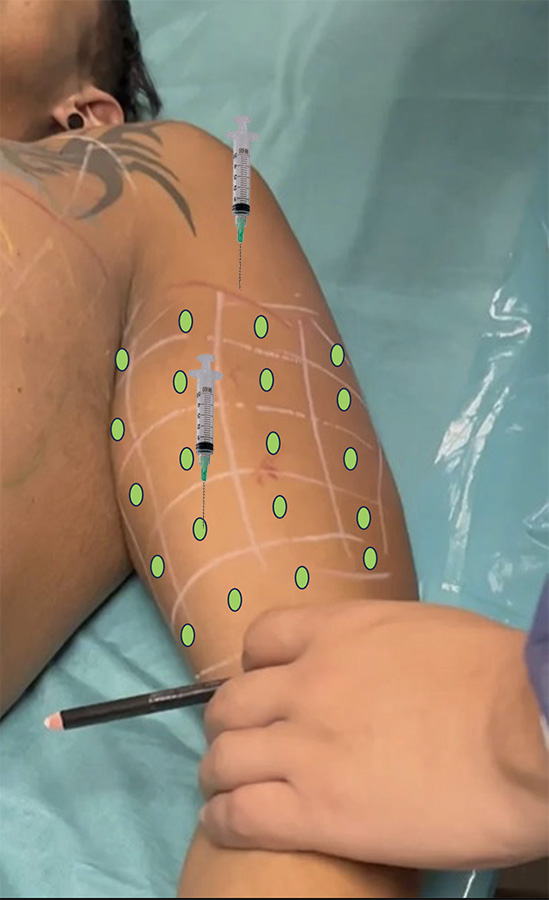
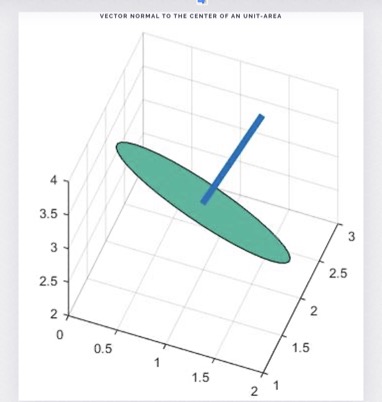
Step 6 : Vectors
-
You need to apply vectors normal to the center of each square with a minimum of 0.1 ml .
-
For bigger squares, the quantity of product should be > 0.1 ml.
Vector normal to the center of an unit-area
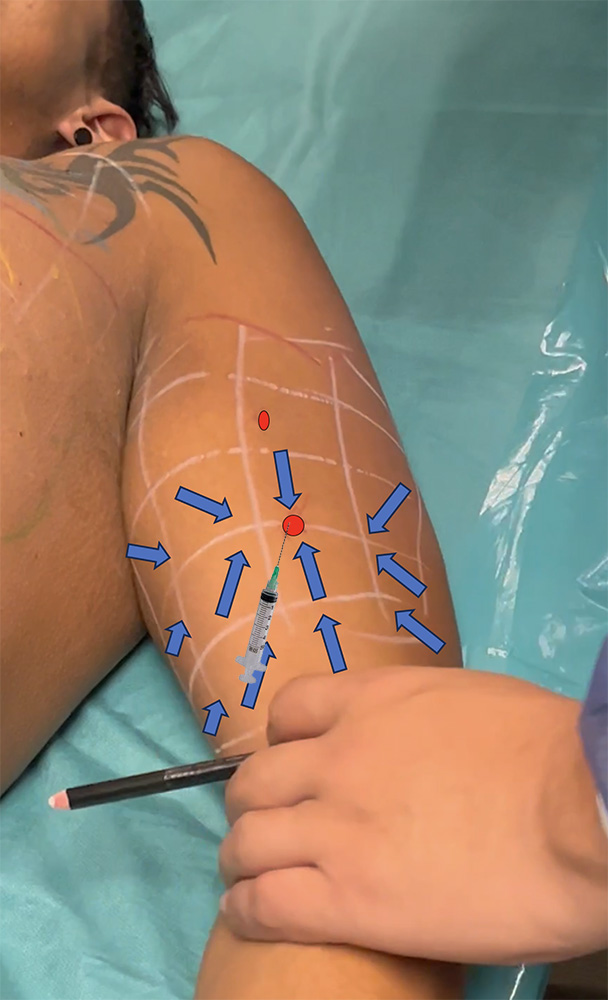
Step 7 : Marking the tensors looking at the distal maximal point of projection
-
The tensors ( here blue arrows) look towards the distal maximal point of projection with a direction and a sense converging all to this distal point of maximal projection.
-
For each tensor, you need to apply 0.1 ml minimum.
-
Bigger quantity of product is applied if the square is bigger
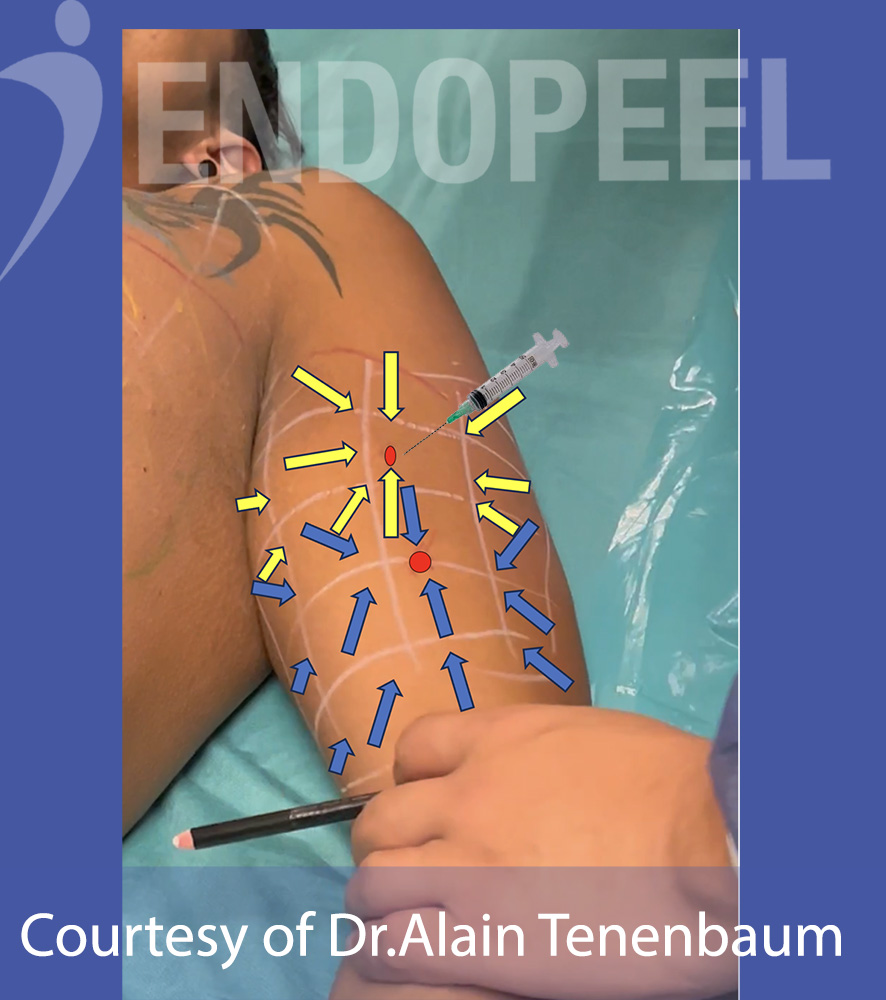
Step 8 : Marking the tensors ( in yellow) looking at the proximal maximal point of projection
-
The tensors ( here yellow arrows) look towards the proximal maximal point of projection with a direction and a sense converging all to this proximal point of maximal projection.
-
For each tensor, you need to apply 0.1 ml minimum.
-
Bigger quantity of product is applied if the square is bigger
- The row between the maximal and the distal maximum points of projections has 2 tensors for each square .
- It can be divided in 2 half raws ,
-1 superior half raw for the tensors converging to the proximal point of maximum projection and
-1 inferior half raw for the tensors converging to the distal point of maximum projection.
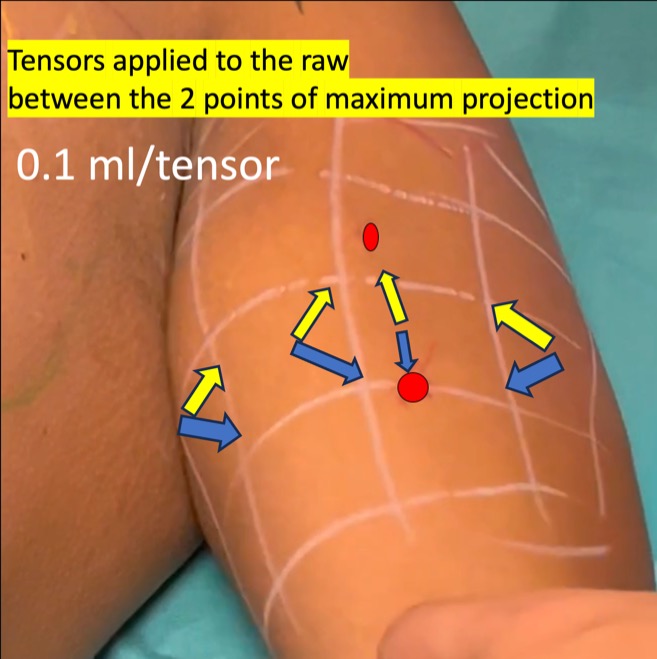
Step 9 :
tensors applied to the the row located between the 2 points of maximum projection
0.1 ml for each tensor
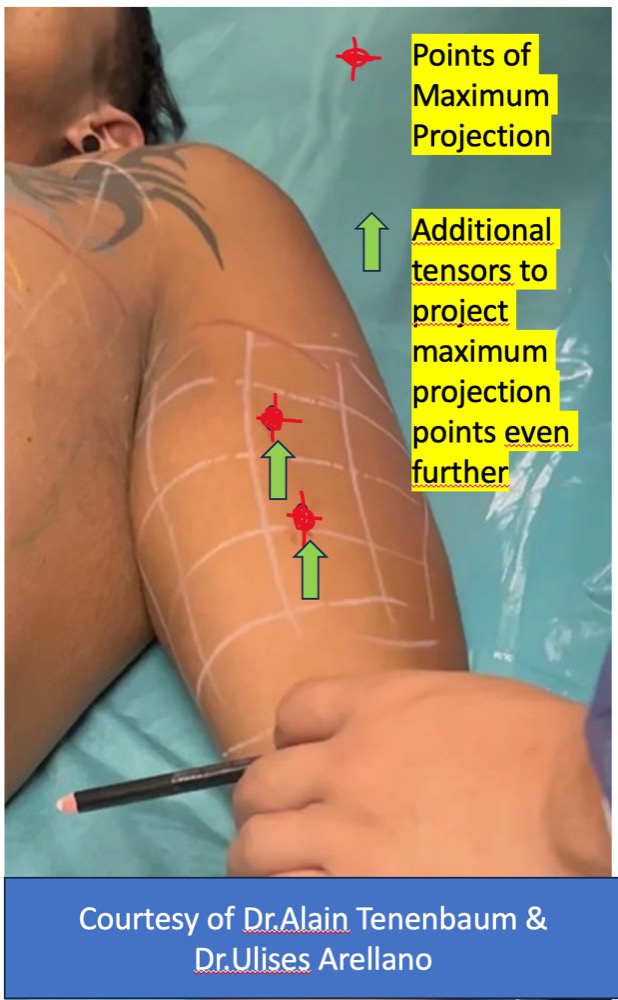
Step 10 : Additional Tensors ( here in green)
-
Additional tensors are done at the end of the procedure to project further the maximum points of projection
-
from 0.1 to 0.3 ml for each additional tensor
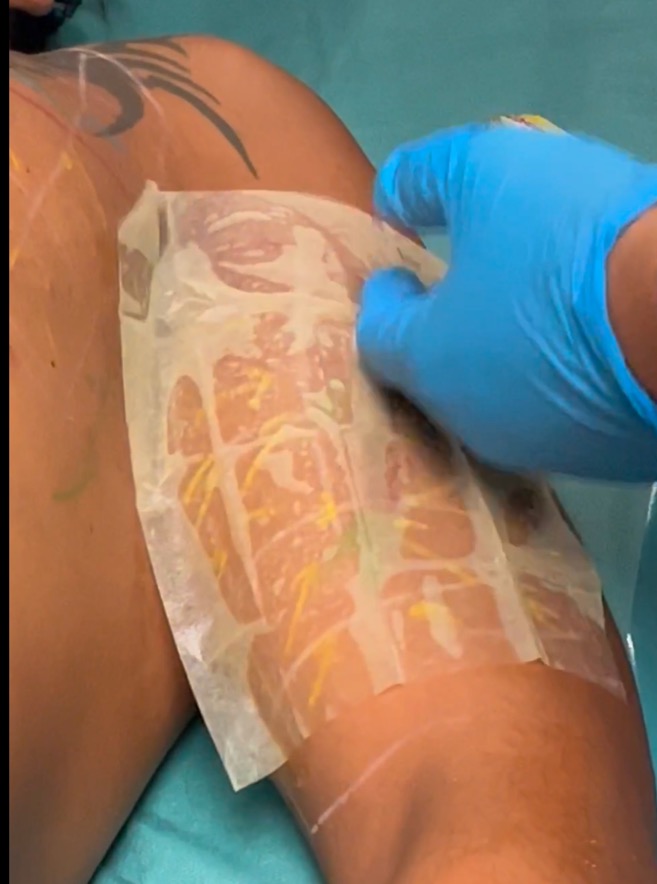
Step 11 : Desinfection
-
Use an impreganted sheet on the marked area without alcohol.
-
If possible, we do recommend cetrimide or chlorexhydine without alcohol or citrosil.

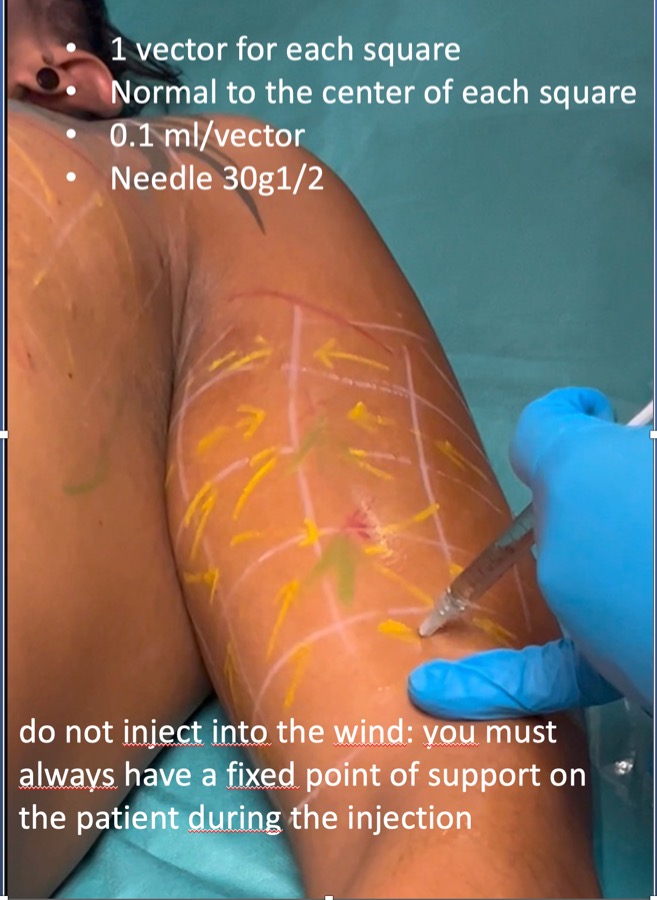
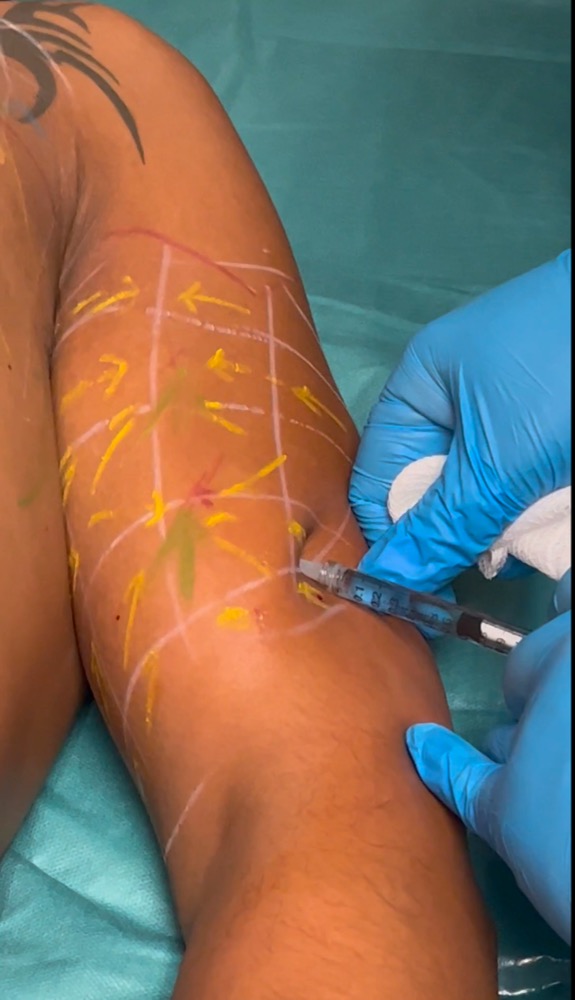
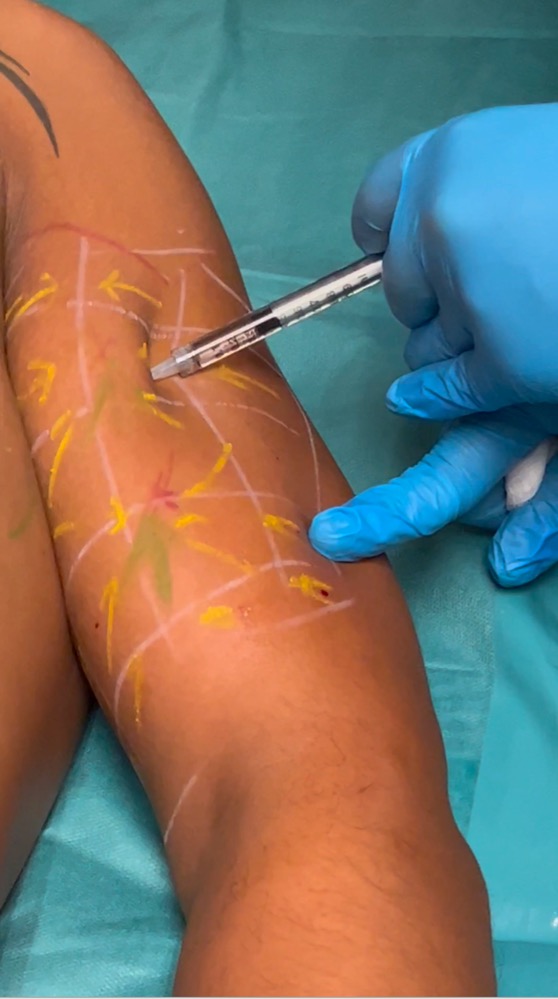
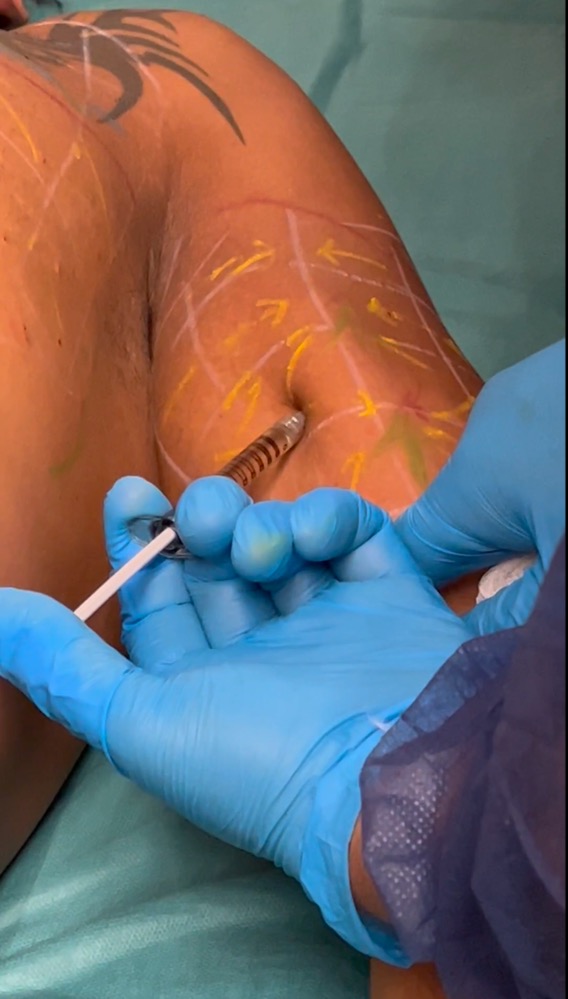
Step 12 : Injection of Vectors
-
1 vector per each square
-
always inject perpendicular or normal to the center of each square 0.1 ml
-
you must have a fixed point of support on the patients skin during the injection ( position of hand and fingers is very important) to avoid to inject ,, in the wind,,


Step 13- injection of Tensors
- 1 tensor per each square , except for the row located between the 2 points of maximum projection, where each square in such row has 2 tensors
- apply always the syringe on the arrow and inject 0.1 ml without moving the syringe, pushing the needle towards the point of maximum projection.
- the syringe has to be in full contact with the patients skin ( dont put a finger between the syringe and the patients skin)
- see some examples of tensors injections on the adjacent pictures